Prerequisites
This document assumes that you have already setup the quick launch URL within SystmOne. If this process hasn't yet been carried out please use the link below to configure the URL.
Setting up care plans from quick glance
Login to SystmOne as a user that has administrative access.
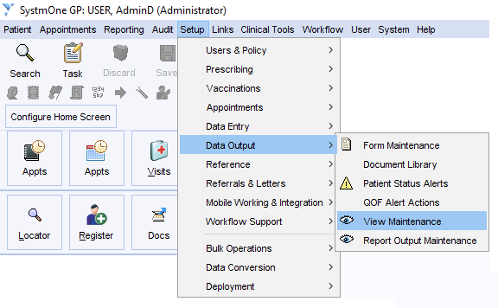
Within SystmOne select Setup – Data Output – View Maintenance
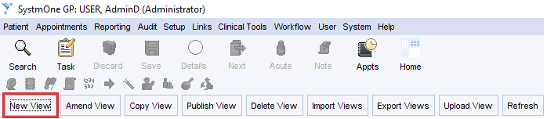
This will open the View Maintenance window. Within this window select the New View option along the top toolbar.
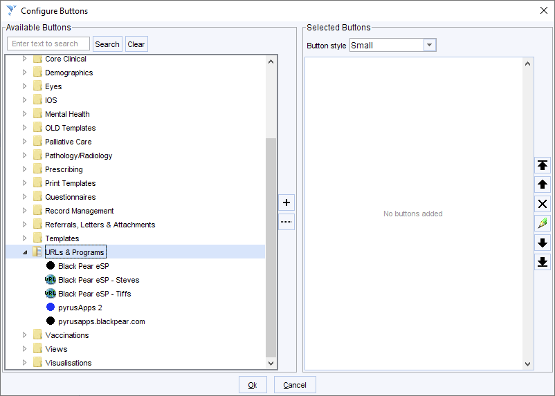
This will open the Create View window. Within this window double click Configurable toolbar

This will open the Configure Buttons view. Scroll down to the URLs & Programs folder.
Alternatively, you can type URL in the search box and search for the URLs.
Within the URLs & Programs folder you should have a list of URLs that have previously been setup. Double click the ones that you desire. These will move across to the Selected Buttons panel.
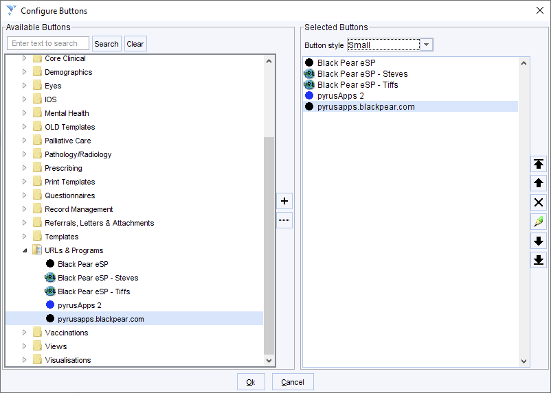
Once you’ve selected the required URLs click Ok at the bottom of the window.
This will take you back to the Create View window. You now need to create a view name along with an icon.
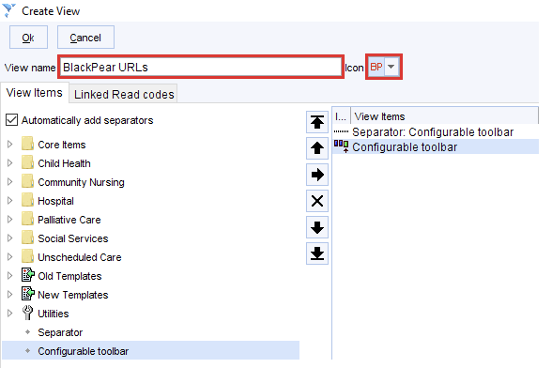
Once you have entered these select the Ok button at the top of the window. This will take you back to the View maintenance window, in here you will now see your new view.

Now we need to setup the new view so that all users in the practice can see it.
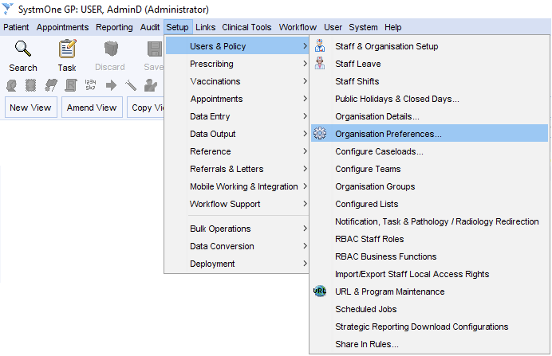
Browse to Setup – Users & Policy – Organisation Preferences
This will open the Organisation Preferences window. In here browse to Clinical Policy and then select Tree Configuration
You can also enter tree into the search panel, and it will bring up Tree Configuration.
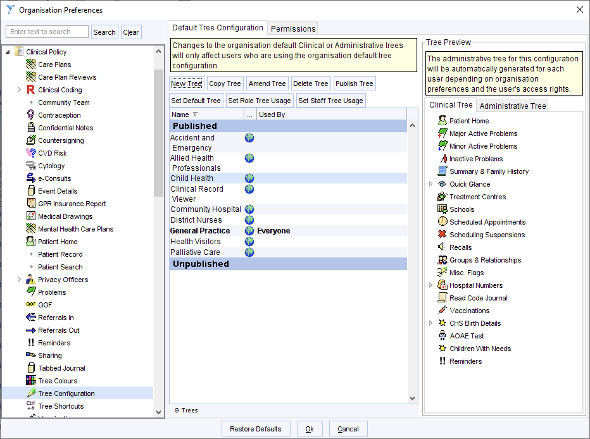
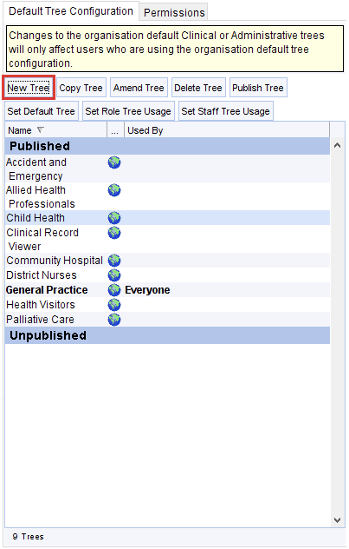
You will see the option to add a New Tree. Click this option.
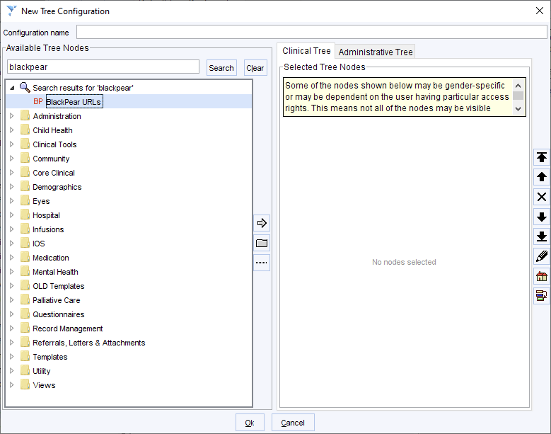
This will open the New Tree Configuration window.
Enter the view name you created earlier and select search. This will display the view you have setup.
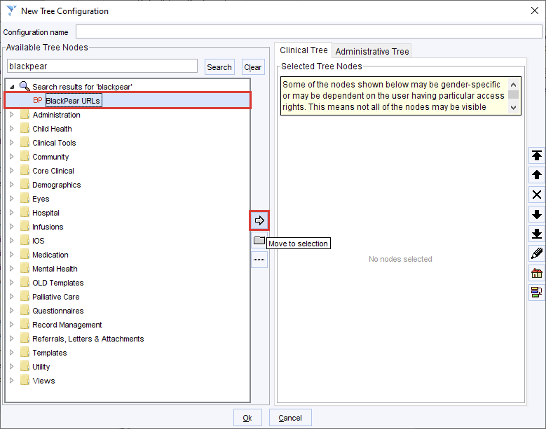
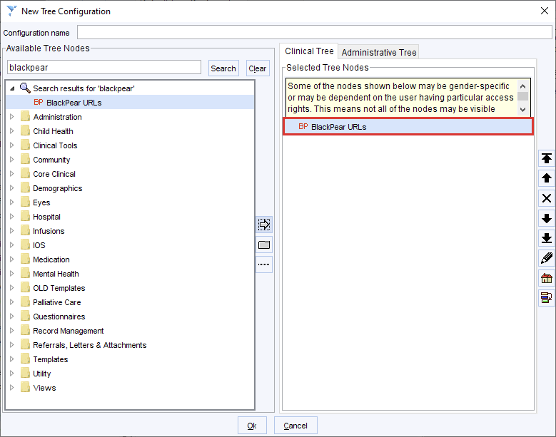
You now need to select your view and click the move button to move it into the clinical tree section.
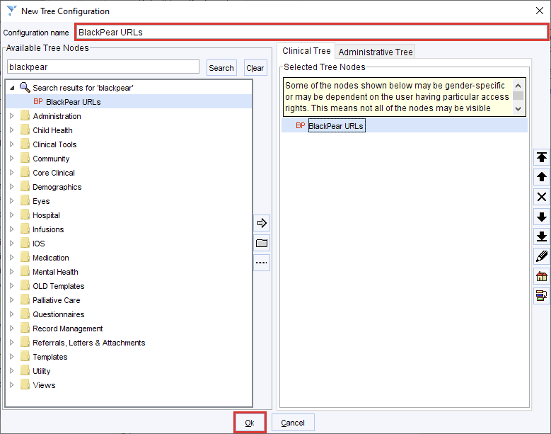
Now set a configuration name.
After setting the configuration name click Ok
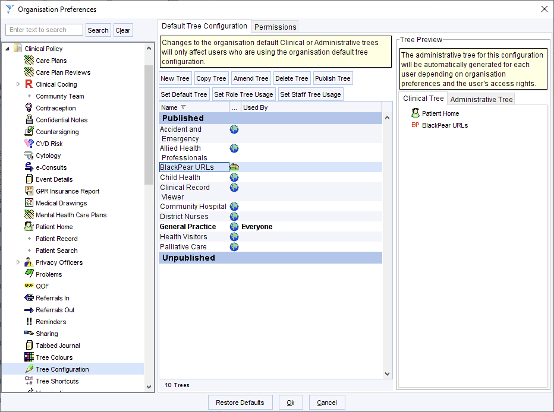
You will see that the organisation preference view has the new configuration. You will notice that it’s currently unpublished.
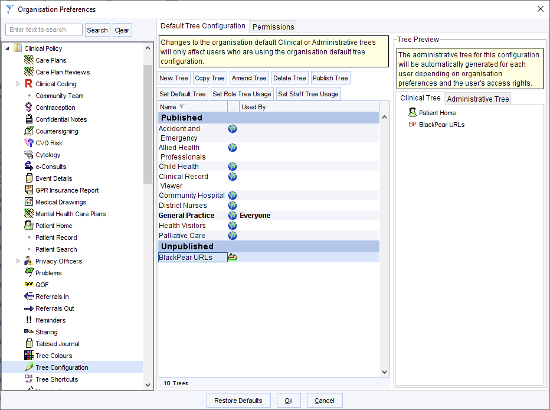
Click the unpublished configuration and select Publish Tree
You will now be presented with a Publish Tree view. In this view you can select which users can see this new view.
For this document we’re going to choose Publish Locally. However, this option is down to practice preference.
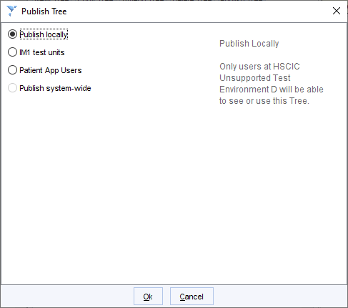
Once you’ve chosen your preferred option select Ok
You will now see that your view has now gone from being unpublished to published
To complete the setup, click Ok
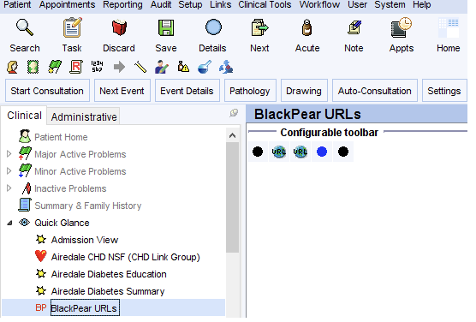
Now when you open a patient record you will see your new option under Quick Glance
0 Comments